Setting up a development environment
Prerequisites
Before you can start make sure you have the following application installed.
- Maven 3.8.4 or higher (build project)
- Git (source control)
- Java 8
- openJDK 1.8 or equivalent
- PHP 8 (Rendering Service)
- Docker 20.10.21 or higher (deployment)
- Docker Compose 2.13.0 or higher (deployment)
- npm 7 or higher (frontend)
- nodejs 14 (frontend)
To get access to the edu-sharing maven repositories you need to edit the maven ~/.m2/settings.xml or create it if it doesn't exist.
Settings.xml
<settings xmlns="http://maven.apache.org/SETTINGS/1.0.0"
          xmlns:xsi="http://www.w3.org/2001/XMLSchema-instance"
          xsi:schemaLocation="http://maven.apache.org/SETTINGS/1.0.0
                              https://maven.apache.org/xsd/settings-1.0.0.xsd">
  <mirrors>
    <!-- MIRROR OPTIONS TO THE EDU-SHARING MAVEN MIRROR -->
    <mirror>
      <id>edusharing-mirror</id>
      <url>https://artifacts.edu-sharing.com/repository/maven-mirror/</url>
      <mirrorOf>!edusharing-remote,!archetype,*</mirrorOf>
    </mirror>
  </mirrors>
  <servers>
    <!-- GIVES YOU ACCESS TO PROTECTED AREAS E.G. CUSTOMER SPECIFIC PROJECTS -->
    <!-- ONLY UNCOMMENT IF YOU HAVE AN ACCOUNT ON OUR SERVER
    <server>
      <id>archetype</id>
      <username>USERNAME</username>
      <password>PASSWORD</password>
    </server>
    <server>
      <id>edusharing-remote</id>
      <username>USERNAME</username>
      <password>PASSWORD</password>
    </server>
    -->
  </servers>
  <profiles>
    <!-- A MAVEN PROFILE TO ACCESS ARCHETYPES -->
    <profile>
      <id>mvn.repositories</id>
      <repositories>
        <repository>
          <id>archetype</id>
          <url>https://artifacts.edu-sharing.com/repository/maven-remote</url>
        </repository>
      </repositories>
    </profile>
  </profiles>
    <activeProfiles>
      <!-- ACTIVATES THE PROFILE DEFINED ABOVE BY DEFAULT -->
      <activeProfile>mvn.repositories</activeProfile>
    </activeProfiles>
</settings>
Setting up a custom deploy project
The simplest and easiest way to setup a deploy project is to use the edu_sharing-community-sdk maven archetype. It's a maven project template which provides the overall docker structure including docker compose files, kubernetes files as well as utility scripts to deploy, debug and develop edu-sharing locally. It also creates a default project structure where you can add your customization for edu-sharing.
- Open IntelliJ and create a new Project
- Choose Maven Archetype under generators.
- Fill out the project name and choose a location where to store the project. (Important: If you want to add the core repos of edu-sharing, they should be in the same parent folder, because mounting is done relative to the deploy folder when developing and running with docker)
- It's important to create a git repository because the maven packages are resolved by the name of the branch, so check the "create git repository" checkbox.
- Also select a JDK 1.8 or equivalent version otherwise you won't be able to build edu-sharing.
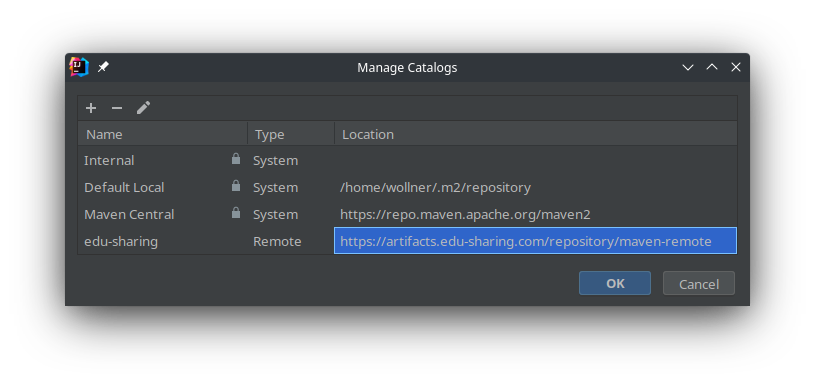
- Under catalog select edu-sharing
or add it by clicking on "Manage catalogs..." the remote location is http://artifacts.edu-sharing.com/repository/maven-remote

- In the archetype drop down menu select org.edu_sharing:edu_sharing-community-sdk-archetypes-project
- Select a version. You should use the latest subversion of edu-sharing. If you want to build edu-sharing 7.0 you should select the latest 7.0 version (e.g. 7.0.0).
- set the project variable und additional properties to the same name as the name (spaces are not allowed here!),
- expand advanced settings and
- set GroupId to "org.edu_sharing" otherwise the parent pom won't be found
- set ArtifactId to the same name as the project properties
- set version to git (just a hint because the version is controlled/forced by the git branch)
- Press "Create"
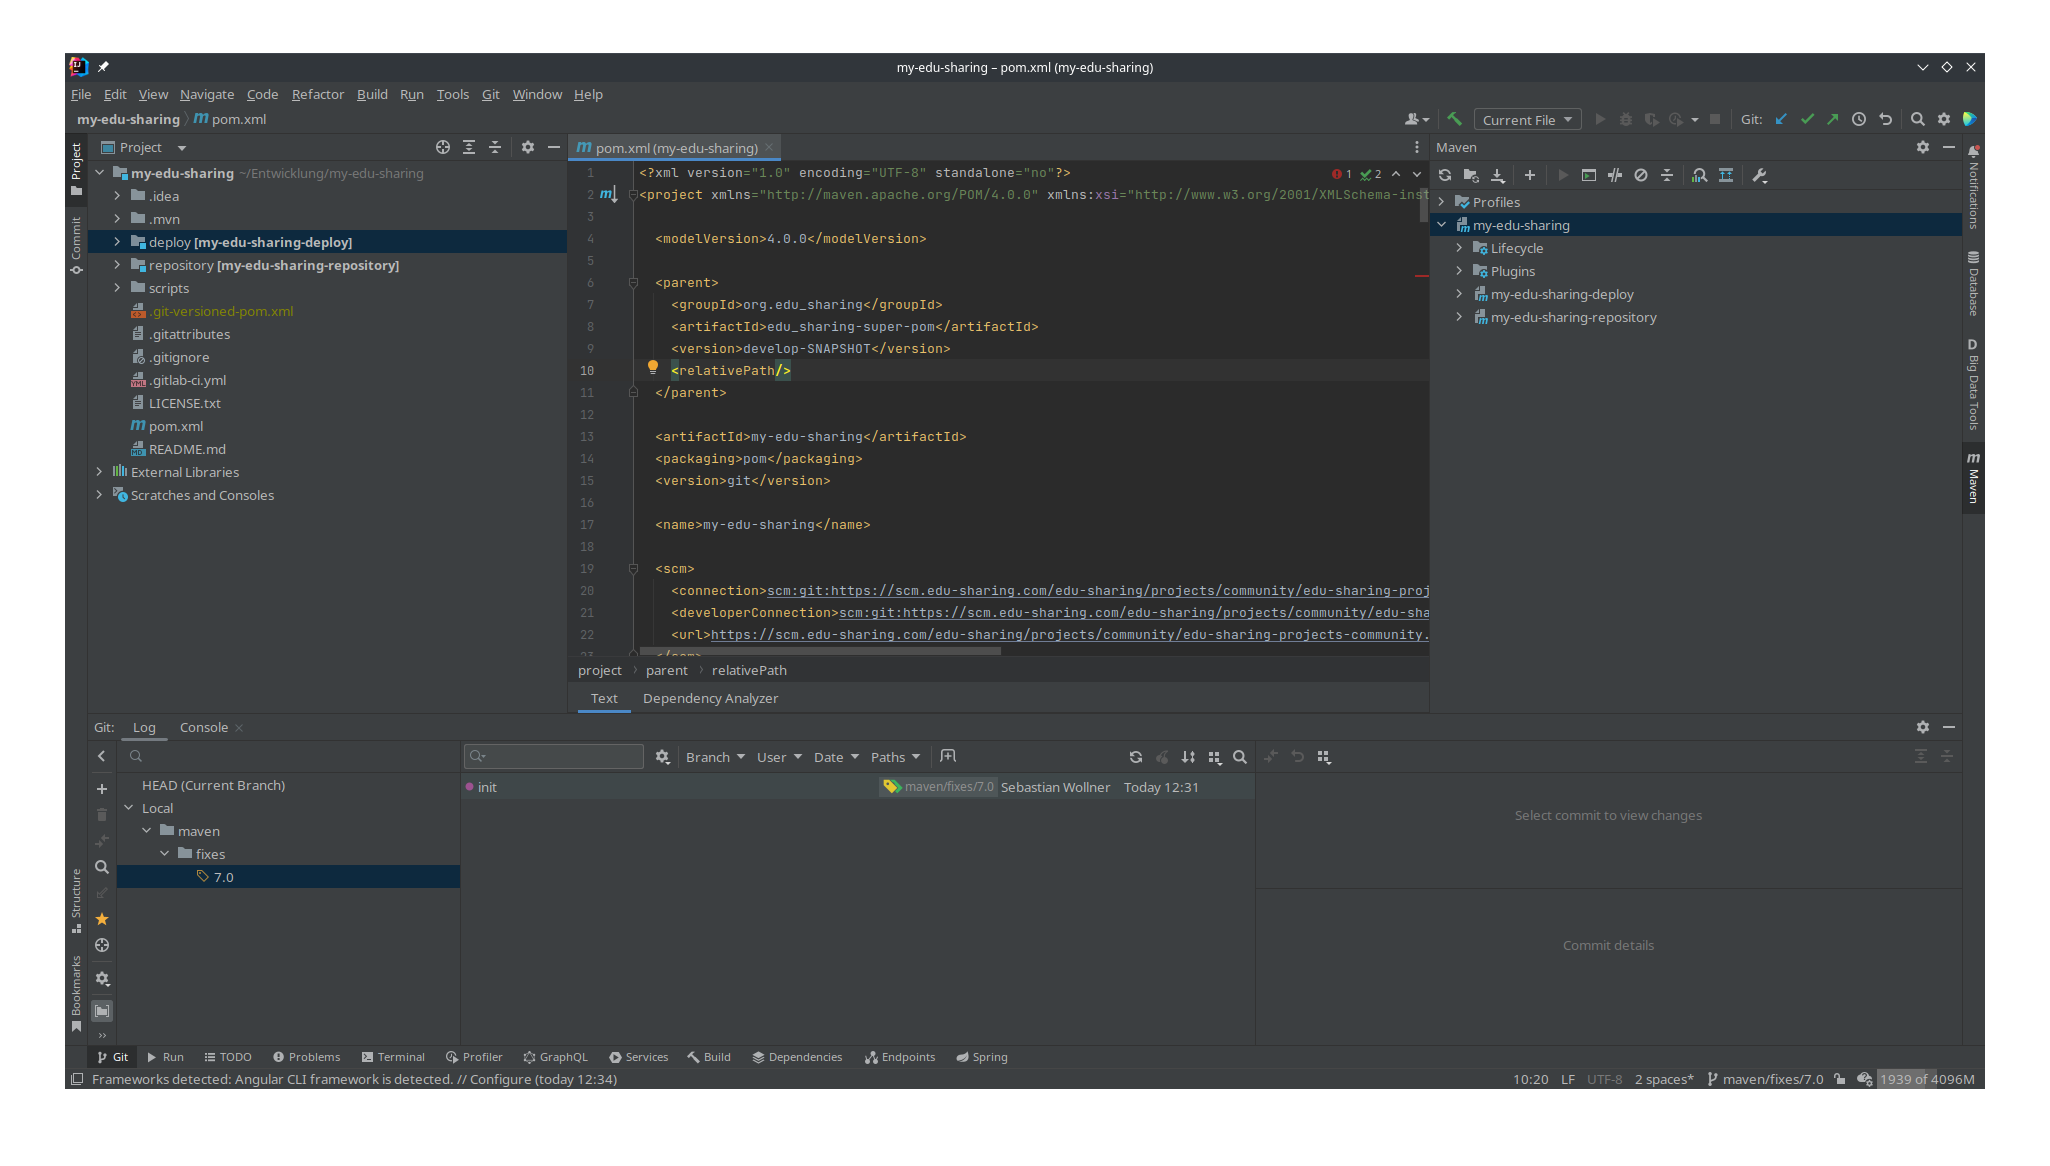
- Go to the Project Settings: File → Settings under Build, Exectuion, Deployment → Build Tools → Maven → Runner click on "Environment variables" and add "REPOSITORY_ELASTIC_ENABLED=true" if you have any other plugins add them as well. Those variables are required to activate maven profiles which controls the application build setup.
- In the root pom.xml set the bom.bom.version property under properties to e.g. 7.0.0-RC57 (major.minor should be the same as the major.minor of the sdk)
- You can now run maven install to build the project. To do so open the maven tab on the right and right click on my-edu-sharing (project name) and click on "Run Maven" → "install"
- To start edu-sharing run ./deploy/docker/deploy.sh lstart. You will now get some information about your edu-sharing instance. Starting all services will take up to 3 minutes
IMPORTANT
Artifact are automatically named by the chosen git branch, therefor all projects have to use the same branch name otherwise maven won't find the required artifacts.

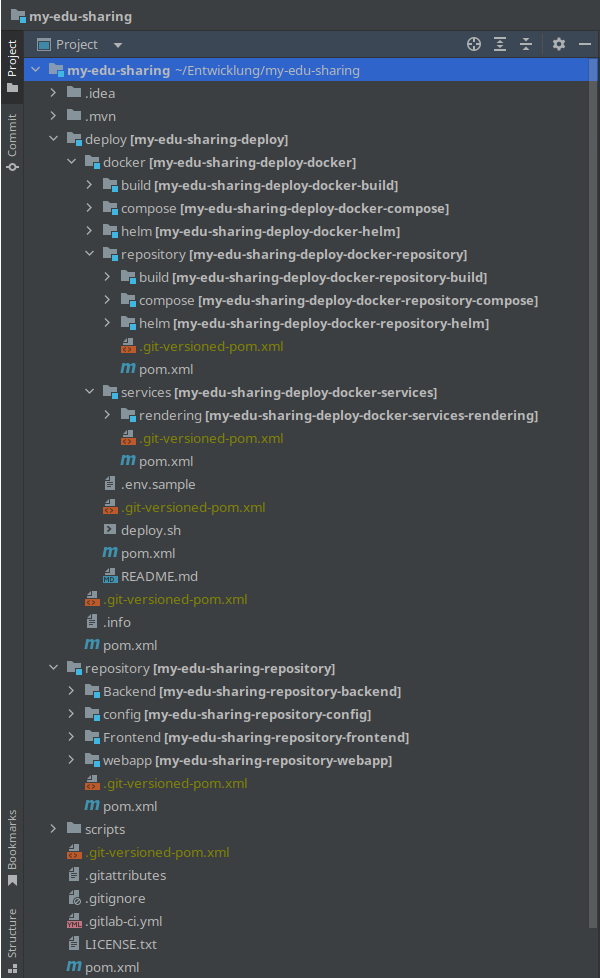
Your Project should look like this
Deploy configurations
Plugins
Plugins extents the behavior of edu-sharing. There version is defined inside the edu_sharing-community-bom project. Plugins will be mixed together in the deploy project. Some parts get composed in the repository service docker, other are just additional containers that need to be started and therefore added to compose and helm configurations. Which plugins are added will be controlled by maven profiles defined in the deploy project. Due to a bug, it is not recommended to control profiles from within Intellij's maven tool window. The recommended way to control profiles is by using the maven environment variable for the specific plugin. To set maven environment variables go to File → Settings -> Build, Exectuion, Deploymnt → Build Tools → Maven → Runner click on "Environment variables"
Environment variables
| Environment variable | values | description |
|---|---|---|
| DEV | true/false | forces to use the current SNAPSHOT version of edu-sharing that is equal to the branch name. |
| REPOSITORY_ELASTIC_ENABLED | true/false | enables or disables repository elastic plugin. |
edu-sharing version
The version of edu-sharing and it's components is defined by the bom.bom.version property in the root pom.xml of the deploy project. You should set the bom.bom.version property value to a specific version e.g. 7.0.0-RC57. If you also want to develop the edu-sharing core you should set the maven environment variable DEV=true to activate the maven dev profile which overrides the bom.bom.version value with ${project.version} which activates the git branch naming mechanism.
pom.xml
  <properties>
    <!-- edu-sharing version -->
    <bom.bom.version>7.0.0-RC57</bom.bom.version>
  </properties>

  ...
  <dependencyManagement>
      <dependency>
        <groupId>${project.groupId}</groupId>
        <artifactId>edu_sharing-community-bom</artifactId>
        <version>${bom.bom.version}</version>
        <type>pom</type>
        <scope>import</scope>
      </dependency>
	...
</dependencyManagement>Launching edu-sharing
To run, debug and develop edu-sharing we've create a deploy/docker/deploy.sh script for that. Basically it calls docker compose commands with the required set of docker-compose files for you. E.g. docker compose -f file1.yml -f file2.yml -f file3.yml up. The compose files are called from docker/compose/target/compose directory therefore you have to build you deploy project first.
Below, you can find a list of useful commands and its meanings. Service means the serivce defined in the docker compose files. Square brackets means that this argument is optional, three dots means there can be more than one and angular brackets means required.
| Commands | Description |
|---|---|
| rstart [services...] | startup containers from remote images |
| rdebug [services...] | startup containers from remote images with dev ports |
| rdev [services...] | startup containers from remote images with dev ports and mounted artifacts |
| lstart [services...] | startup containers from local images |
| ldebug [services...] | startup containers from local images with dev ports |
| ldev [services...] | startup containers from local images with dev ports and mounted artifacts |
| info | show information |
| logs [services...] | show logs |
| ps | show containers |
| stop [services...] | stop services |
| remove | remove all containers and volumes |
| terminal <service> | open container bash as root |
Deploy project without core components
This section is for the case you want to develop an edu-sharing extension only without checking out the core community components.
In this case you have to use rstart, rdebug and rdev to start edu-sharing. Otherwise the docker images of edu-sharing plugins won't be found. But before you can do so, You have to delete the following files:
- deploy/docker/compose/src/main/compose/0_edusharing-remote.yml
- deploy/docker/repository/compose/src/main/compose/1_repository-remote.yml
- deploy/docker/services/rendering/compose/src/main/compose/1_rendering-remote.yml
To use rdev also requires some changes:
In "deploy/docker/repository/compose/src/main/compose/1_repository-dev.yml" file delete all line starting with "- "${GIT_ROOT}/repository/Backend" under volumes.
Delete the deploy/docker/services/rendering/compose/src/main/compose/1_rendering-dev.yml file.
deploy/docker/repository/compose/pom.xml add <excludes>*-dev.yml</excludes> to the configuration part of the maven-dependency-plugin plugin.
      <plugin>
        <groupId>org.apache.maven.plugins</groupId>
        <artifactId>maven-dependency-plugin</artifactId>
        <executions>
          <execution>
            <id>plugins</id>
            <goals>
              <goal>unpack-dependencies</goal>
            </goals>
            <phase>generate-resources</phase>
            <configuration>
              <includeArtifactIds>
                edu_sharing-community-repository-plugin-elastic-deploy-docker-compose,
                edu_sharing-community-repository-plugin-mongo-deploy-docker-compose,
                edu_sharing-enterprise-repository-plugin-antivirus-deploy-docker-compose,
                edu_sharing-enterprise-repository-plugin-cluster-deploy-docker-compose,
                edu_sharing-enterprise-repository-plugin-remote-deploy-docker-compose,
                edu_sharing-enterprise-repository-plugin-transform-deploy-docker-compose
              </includeArtifactIds>
              <excludes>META-INF/**</excludes>
              <excludes>*-dev.yml</excludes>
              <outputDirectory>${project.build.directory}/compose</outputDirectory>
            </configuration>
          </execution>
        </executions>
      </plugin>
Don't forget to rebuild (mvn clean install) your project.
edu-sharing core developing
Adding edu-sharing core repositories
If you want to modify the existing core modules of edu-sharing the best practice is to create a fork of the desired github repos and check them out in the same parent folder as your deploy project.
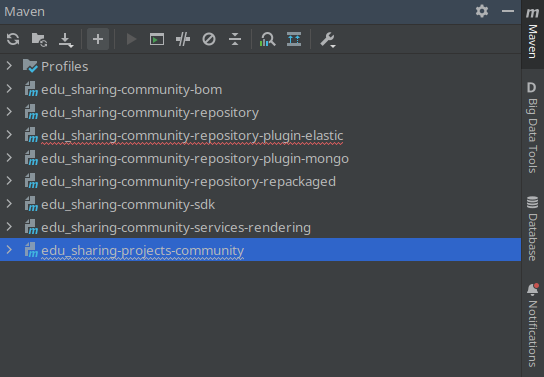
After you've created all repositories, open your deploy project and in the maven module click on the plus icon to add them to your project.

The required projects:
| Project | Link | Description |
|---|---|---|
| edu_sharing-community-bom | https://github.com/edu-sharing/edu-sharing-community-bom | This projects defines the version used to build the edu-sharing software. (Bill of material) |
| edu_sharing-community-repository | https://github.com/edu-sharing/edu-sharing-community-repository | The edu-sharing repository |
| edu_sharing-community-repository-plugin-elastic | https://github.com/edu-sharing/edu-sharing-community-repository-plugin-elastic | Extends edu-sharing to uses elastic search features |
| edu_sharing-community-repository-repackaged | https://github.com/edu-sharing/-edu-sharing-community-repository-repackaged | Repackage tackles fixes on jar packages |
| edu_sharing-community-services-rendering | https://github.com/edu-sharing/edu-sharing-community-services-rendering | Rendering service used to render all the different content types |
Build order
It's important to retain the build order otherwise you'll discover weird behaviors or bugs because older artifact versions will be used in the depending projects.
| Project | Build steps |
|---|---|
| Repository | |
| edu_sharing-community-repository-repackaged | maven install |
| edu_sharing-community-repository | maven install |
| Repository Plugins | |
| edu_sharing-community-repository-plugin-elastic | maven install |
| Services | |
| edu_sharing-community-services-rendering | maven install |
| BOM | |
| edu_sharing-community-bom | maven install |
| Deployment | |
| deploy project | maven (clean) install |

