Activating edu-sharing for Atto
Activating edu-sharing for the Atto editor on a system with no prior edu-sharing integration
As of version 6.0 there is no need for additional configuration steps in order to activate edu-sharing for Atto.
Switching to the Atto editor on a system with objects integrated using the TinyMCE
If you are switching from TinyMCE to Atto on a Moodle with an edu-sharing integration activate the Atto-editor first.
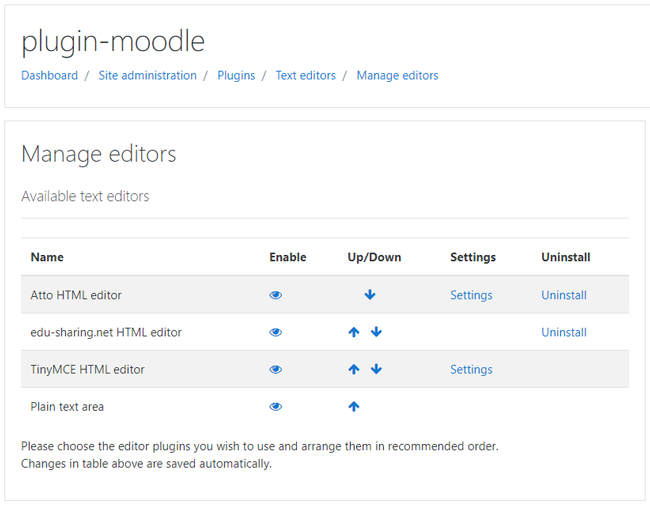
To activate the edu-sharing option for the Atto-WYSIWYG editor, navigate to "Site administration" > Plugins > Text editors > Manage editors.

managing the Moodle editors
Activate the „Atto HTML editor" by clicking on the eye-button (enable); move it to the top of the list by means of the arrows (Up/Down).
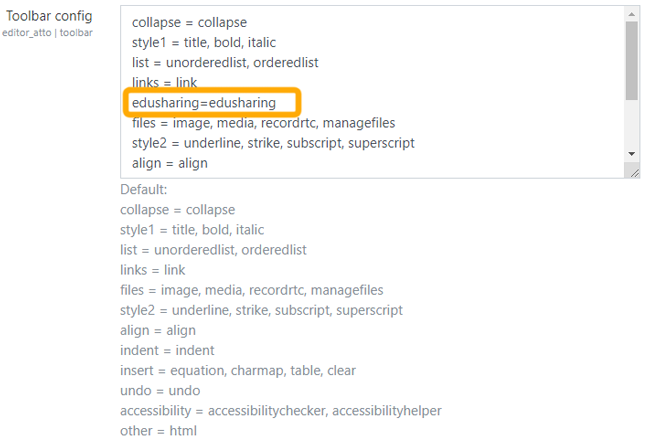
Now you have to integrate the edu-sharing button in the Atto toolbar. To do so open the Atto configuration in Moodle by clicking on "Settings" in the corresponding line of the "Manage editors - block".

You can add it to one of the preset sections of the toolbar such as "files" by adding it to the tools of that list (e.g. files = image, media, edusharing) or you can create your own edu-sharing section in the toolbar as shown in the image above.
You will need to run an CLI update script in order for your embedded objects to be displayed correctly.
You can download the script from our GitHub page.
This script migrates edu-sharing objects inserted with TinyMCE for use with Atto.
Migrated objects are NOT editable with TinyMCE anymore - so there is no way back. If you are unsure please make a backup.
If the script is started without parameters, all objects from all course sections will be migrated. It is also possible to specify a list of courses for which the migration will take place.
You can get instructions how to use it with "php edusharing_migrate_tinymce_atto.php -h".
It is strongly recommended to set Moodle to Maintenance Mode before migration and to backup the database!
